SETUP USER DEFINED RATES
A User defined rate is used when a user or customer service wants to manually add additional charges to a consignment. V6 provides this feature so that extra charges can be captured at point of entry.
To setup User Defined Rate go to Menu>Administration>Rates>User Defined Rate Setup.
.png)
-
Doc No is a system generated number and does not need to be populated.
-
Code is an alphanumeric field used to define the rate
-
Customer is for whom the rate is being setup for or blank for all customers.
-
Customer class is used to divide customers into categories (or groups) so one rate policy can be applied or leave blank for all.
-
Job type helps to categories the consignment for rating or leave blank for all job types.
-
Service type is used to rate consignments of a particular service or leave blank for all service types.
-
GL Account, GL Department and tax code are used to direct consignment revenue to the correct accounts.
On this screen (see below), if the Customer Selectable field is ticked, this user-defined rate will be shown to the customer booking screen as an extra service for them to tick.
If the Fuel Levy Applies box is selected, then the rating process will take the fuel levy into account.
If the chargeable box is selected, this rate is a service which requires a payment when using this. The payment details related to this service is added to a consignment when it is reviewed by customer service users, often by adding a user defined rate to it.
.png)
SETUP DISTANCE & TIME RATES
This type of rate is based on distance and time of travelling to calculate the payment on a consignment.
Go to Menu>Administration>Rates>Distance and Time Rates
.png)
-
Doc No is a system generated number and does not need to be populated.
-
Customer is who the rate is being setup for or blank for all customers.
-
From date and Expiry date are used to help with users with the uprate process.
-
Job type helps to categories the consignment for rating or leave blank for all job types.
-
Service type is used to rate consignments of a particular service or left blank for all service types.
-
GL Account, GL Department and tax code are used to direct consignment revenue to the correct accounts.
-
Doc No is a system generated number and does not need to be populated.
-
Customer is who the rate is being setup for or blank for all customers.
-
From date and Expiry date are used to help with users with the uprate process.
-
Job type helps to categories the consignment for rating or leave blank for all job types.
-
Service type is used to rate consignments of a particular service or left blank for all service types.
-
GL Account, GL Department and tax code are used to direct consignment revenue to the correct accounts.
.png)
SETUP FUEL LEVY RATES
Fuel Levy rate are used to recoup some of the operating cost associated to fuel.
To setup fuel levy rates, go to Menu>Administration>Rates>Fuel Levy Rates
.png)
Add or edit fuel levy rates
-
Code is an alphanumeric field used to define the Fuel levy.
-
Description name for the Fuel Levy
-
GL code and Department code are used to direct revenue to the correct accounts.
-
Start and End date time the Fuel levy runs for.
-
Rate % is the percentage of revenue that is charged as fuel levy.
-
Add blank line creates a new line below the current fuel levy for future levy’s.
.png)
SETUP RISK LEVY RATE
Risk levy can be applied onto a consignment booked within specified dates.
To setup go to Menu>Administration>Rates>Risk Levy Rate to setup. (Risk Levy can be applied at a global level, customer level or a ratecard level.)
.png)
Add or edit risk levy
-
Code is an alphanumeric field used to define the customer class.
-
Description is used to describe the class.
-
GL Account and GL Department are used to direct consignment expenditure to the correct accounts.
-
Start date and End date are used to apply the rate to consignment within this range.
-
Charge $ is the amount of the levy
.png)
Subhub
Location
Unserved
Location
Depots
Delivery Estimate
Subhub
Location
Unserved
Location
Depots
Delivery Estimate
SETUP AGENT RATES
An Agent rate is applied when calculating the charges that are payable to an agent. Like customer quoted rates, the user can define an Agent rate using various parameters and the quantity breakdowns.
Go to Menu>Rates>Agent Rates to setup agent rates.

Add or Edit Agent rates
-
Doc No is a system-generated number and does not need to be populated.
-
The agent is who the rate card is being set up for.
-
From date and Expiry date are used to help with users with the uprate process.
-
From Location and To Location is used to look at consignments collect and delivery location. Locations are treed as Zone>Area>Town>PostCode>Suburb.
-
Job type helps to categories the consignment for rating.
-
Service type is used to rate consignments of a particular service.
-
Vehicle type is used so rates can be defined by vehicle grouping.
-
Freight class is used to rate grouped product items.
-
Rate basis used to calculate based on Weight, Items, Pallets and Volume
-
Rate break type is used to define an unlimited number of volume break points, which can be stepped or normal.
-
GL Account, GL Department and tax code are used to direct consignment expenditure to the correct accounts.
.png)
WAREHOUSE INBOUND GUIDE
WAREHOUSE
NEW WAREHOUSE INBOUND REQUEST OR EDIT WAREHOUSE INBOUND REQUEST
Warehouse Inbound Requests is the primary way in which customer inventory is entered into stock and managed in V6.
Please also refer to Warehouse Scan Guide for how to use scanners in V6 Warehouse.
To create an Inbound Request, go to Menu > Warehouse > Warehouse Orders > Inbound Request.

The Warehouse Inbound Request screen has multiple sections and this is where all the details of the request are entered.

SECTION 1- SENDER DETAILS
The Sender detail section is where the following information is entered;
-
Sender Name – This is where the senders/pickup names are entered.
-
Address fields – The Address fields are used to display the pickup address.
-
Contact Name – This is used as a point of contact at the address.
-
Phone – The Phone field is used as contact details based on the address.
-
Sender Reference – This field is used as reference for the request if required.
-
Add this entry as new Sender – This flag is used to add a new address into the database permanently.

SECTION 2- RECEIVER WAREHOUSE

The Receiving Warehouse section is where the Receiving Warehouse is entered;
-
Receiving Warehouse – This is a pull-down menu where the user selects which warehouse is receiving the delivery.
SECTION 3- JOB DETAILS
Job Details are where job specific information is added;
-
Job Type – This field is a pull-down menu information that is controlled by the transport company and is related to how they will rate your consignment. (These fields will need to be discussed with your transport company.)
-
Service Type – This field is a pull-down menu information that is controlled by the transport company and is related to how they will rate your consignment. (These fields will need to be discussed with your transport company.)
-
Consignment Number – This field is where you record your consignment reference number. (Fields with a red asterisk * are mandatory fields and need to be populated.)

SECTION 4- FREIGHT DESCRIPTION AND INSTRUCTION DETAILS
The Freight Description and Special Instruction/Storage Period Details are free text fields to record details about the freight;
-
Freight Description – This field is used to add a brief description for the freight to be picked up.
-
Special Instruction/Storage Period – This field is prepopulated with INBOUND REQUEST but can have any other instructions added.

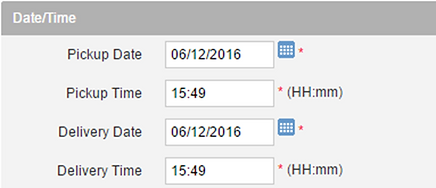
SECTION 5- DATE/TIME DETAILS
The Date/Time Details are used to help the transport company plan their fleet;
-
Pickup Date – This field is used to add the date the pick up is required.
-
Pickup Time – This field is used to add the preferred pick up time.
-
Delivery Date – This field is used to add the date the delivery is required.
-
Delivery Time – This field is used to add the preferred delivery time.
SECTION 6- ITEMS TO BE SHIPPED
Items are where users can choose the type of freight, quantities, dimensions, weight etc.

To delete a line, click the (X) icon on the rightmost column. The list of product types is set up in Freight Class by your transport company. (Any product changes need to be discussed with the transport company)